A Quick Review: Minions

29 June 2015

I went and saw Minions on the weekend with Josh, because we both enjoy animated movies, and we seriously loved both Despicable Me movies. This movie goes back in time, back when dinosaurs roamed the earth and the more little minions begun their search to find the most despicable villain that they can serve. But things never seem to go as planned. 

After settling and believing they'll never find a true villain to follow their lives become dull. So three brave little minions Kevin, Stuart and Bob, set off on their own mission, to find the evilest of them all! Their venture takes them all the way to Orlando, Florida, right to an underground convention. Villain Con. 

At the start of the movie Josh and I were a tad unsure how it was going to go, seeing as the main characters do not speak english. Instead they speak a form of Minionese which is basically gibberish with random words in other languages thrown in, some words are in English. 

But this was not an issue, the minions are very visual characters, and there is plenty of story development through the voices of the narrator and the human characters. 

We both found the film incredibly enjoyable for an animated movie, which we pretty much always like anyway. But still different from the Despicable Me franchise that we all know and love. If you like this type of movies though then I would definitely recommend. The minions are the cutest evil henchmen you will ever come across. 
Do you like animated films? Do you want to watch Minions?


Follow
Follow Me on Bloglovin' / Follow Me on Instagram

Meet Giant Uni

27 June 2015

Meet Giant Uni!  Smoko Inc's Newest, cutest & biggest lamp!
Meet Giant Uni! The World's most Magical LED Unicorn Lamp! The Giant Unicorn Lamp is Smoko Inc's newest venture, and in order to get it funded they have created a Kickstarter! They currently only have a small unicorn nightlight available but with your help, they can bring the Giant Unicorn to life! 

I was super glad to help out with this project, so give the Giant Unicorn Lamp video a watch, because I got to record the voiceover! All the way from Australia.


If you haven't used Kickstarter before, it involves choosing a certain amount of money to pledge towards the cause, and in this case it's funding the production of a unicorn lamp. Each amount that you donate has a different reward. 

When the Unicorn Lamp gets fully funded they will cost $125 a pop. But the first 100 Unicorn Lamps will only set you back $85! That's a $40 saving! 

Each amount that you pledge will allow you a different reward.
I hope you'll head over to their Kickstarter page and help out! I can't wait for the Giant Unicorn Lamp Kingdom to come to life! 
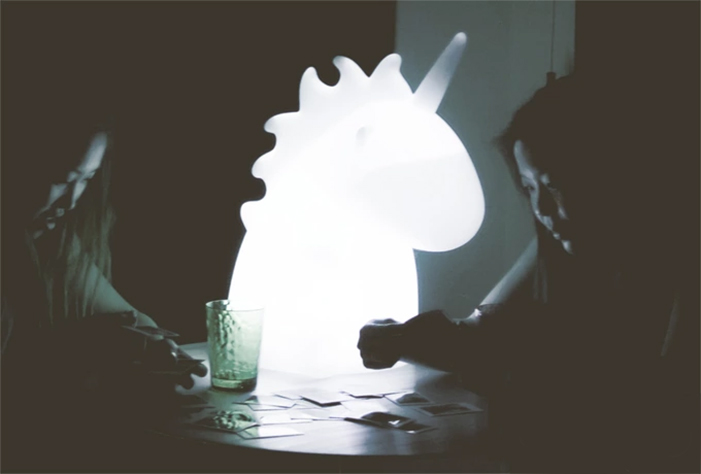
Me practising how life will be when I have the giant unicorn lamp
The kickstarter is already doing so so well! I'm so pleased!   HAS ALREADY HIT TARGET! Oh my god I'm so happy! Woot woo!  Giant unicorns for all!

Also how cool is that photo of me and the unicorn, the one pictured is actually only the size of my hand. It's all about perspective baby!

You should also totally follow Smoko Inc on Instagram! They're always regramming me doing stupid stuff! Haha. Also follow me on instagram, so you get to see the stupid stuff first. 

Go here to support the Giant Unicorn Lamp Kickstarter!

BTW if You hadn't noticed, I will now be posting on a Saturday as well as Mon/Wed/Fri! 


Follow
Follow Me on Bloglovin' / Follow Me on Instagram

New Hair Day

26 June 2015


I am so excited to finally get my hair finished! I kept hunting for inspiration on pinterest but I could never really put my finger on exactly what I wanted, but my brilliant hairdresser Chantelle somehow managed to get it exactly right anyway. 

My super dark locks have been lightened considerably. I chose an ashy shade, and wanted the colour to fade to an ashy blonde at the ends. Chantelle did a marvellous job at blending the colours! It looks amazing! I am beyond ecstatic with the results honestly. 
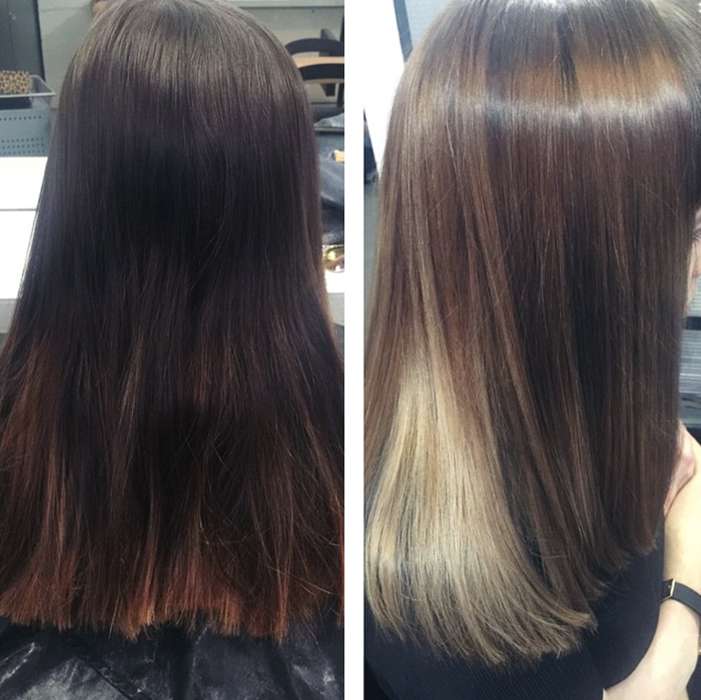
Taken from Chantelle's Instagram Co.Hair
You can have a better look at my before hair, and well the first chapter of my hair journey here. The above picture of the before & after barely does the makeover justice!

The final addition, I got a bit of a sneaky undercut at the back! Which I already love. You can only see it when my hair is up, but I really like it. It was hard to take a photo seeing as its the back of my head. But I gave it a go. 


I got about 3 inches taken off the ends, because it was getting a bit tatty and becoming harder to comb through. It's quite short again, but I'm still a massive fan and it doesn't seem to take long for my hair to grow. In the meantime I will enjoy how easy it is to have shorter hair.

The colour I've chosen mean that my regrowth will blend in properly and I won't need to have any touchups for a long time. 


Does your hair require a lot of upkeep? Have you thought about changing it lately?


Follow
Follow Me on Bloglovin' / Follow Me on Instagram

Loreal Superliner Blackbuster Review

24 June 2015

I've never been big on liquid eyeliners, because firstly I'm not very good at doing my eyeliner, and secondly my eyelids are quite hooded. One more than the other. Which means that it's hard to apply the eyeliner and even harder to make them look even because it always looks like one is thicker. 

Confusing and annoying. I've had one liquid eyeliner in a sharpie type design before, but it was quite thin and not that good quality. Since a lot of beauty brands lately have started putting out thicker eyeliner markers, I thought I would give this one a go. 
I got my eyeliner on sale for $11 from Priceline, but it's RRP is $16.95.
The eyeliner is quite thick, but has a thin tip which means I can both apply thick and thin lines depending on how I use it. It went on pretty easy and I found it was quite pigmented but not messy. 
I didn't get any smudgey eyeliner imprint on my eyelids like you do from some eyeliners, as it dried fairly quickly. I usually always sweep some face powder on my lids though to prevent this from happening anyway. 

For $11 I was pretty happy with the results, and it has given me a bit more confidence to wear liquid eyeliner. When I've built up my skills a bit more I might finally give liquid eyeliner with a brush an attempt!
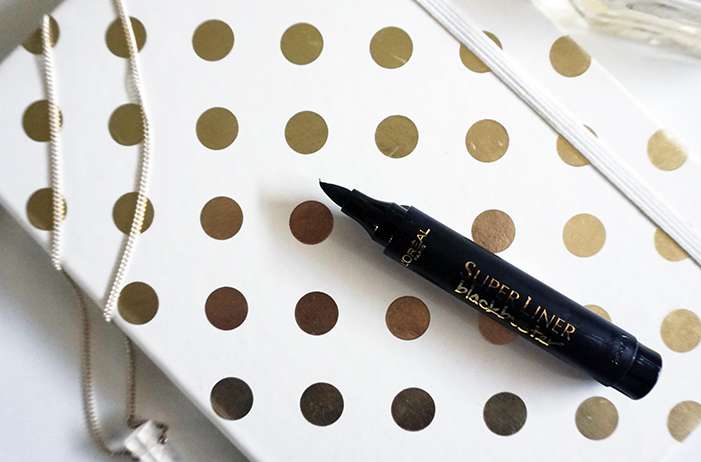
Hooded Lids are not friends with Eyeliner. 
So there you go! If you're looking for a liquid eyeliner in a pen, then I thought this was pretty satisfactory, especially for the price.


Follow
Follow Me on Bloglovin' / Follow Me on Instagram

Blogging 101: Setting out a Blog Post

22 June 2015

How To Set Out a Blog Post & Other Settings behind the scenes

As per usual I like to have all my Blogging 101 posts, centered more around design and layout aspects, rather than anything related to what to write. This post today is going to be focused formatting, layout and design of your actual blog post. There will be some things specific to Blogger but the majority of this will be relevant for everyone. 

Checking in on New Years Resolutions

19 June 2015


We're almost halfway through the year now and I thought it was time that I went back and had a look at the goals and resolutions I had set myself, and how I am progressing towards those goals.

1.  Come Back from my USA trip with Money:
Sooo I actually did, but not too much money. I bought a coat that was around $250 so that was a bit. Then when I returned from the US, I had to go through all this drama to get back an almost $400 deposit that I had to put down to rent bicycles. That took ages, but at least I also had that money leftover. But overall, I successfully completed this goal!

2. Book a Holiday for 2016:
This goal may end up changing to 2017, just because money is tight being newly moved out. But Josh and I have definitely spoke about booking a trip around Europe, so this will happen, but probably not this year, so not really a fail, just an adjustment. 

3. Try to Save $5,000:
I'm halfway there on this goal, and I could probably save the rest pretty easily but there is just always so much stuff to buy. Like I'm currently getting my hair colour lightened, and I want to decorate the rooms in my house properly. Everything costs money. I'm not saving for anything in particular, just saving. 

4. Buy a Bicycle / Ride more Places:
I did actually have the money to buy this bike, but then I was worried that I was going to waste my money and never even ride the bike. So I haven't bought it yet. But I really want to, hopefully when the weather is better. I'm most likely not going to be riding anywhere at the moment as it's too cold and it has been raining a lot. So perhaps at the end of Winter!

5. Be More Fun:
I'm not really sure what I even meant by this really. Or how I wanted to complete this in a measurable sense. I haven't said no to any activities, and try to actually initiate hang outs with people. So in that way I think I have started on the way for this resolution. 

6. Continue Blogging!
Yes sir! I definitely have kept this resolution in action. I've been blogging regularly, and with a schedule. Monday, Wednesday & Friday. So it looks like this will be continuing for the foreseeable future! I'm enjoying it anyway. 

Cya! xx


Follow
Follow Me on Bloglovin' / Follow Me on Instagram

A Quick Review: Jurassic World

17 June 2015


I cannot express how incredibly keen I was for this movie to finally come out. I'm not exactly sure what it is with me and dinosaurs but I love them. I could barely contain my squeals as the opening credits started. 

In the not so distant future, Jurassic World is finally open for business, with quite a range of carnivores and herbivores for everyone to visit. Jurassic World is set 20 years after the first Jurassic Park movie, where they have finally fulfilled Hammond's wishes, and opened an enormous Dinosaur island Resort to the public. 

The resort is very popular, but the visitors are steady. Popularity always spikes when a new dinosaur is introduced, but the people want bigger, they want scarier and with more teeth. Meet Indominus Rex. The newest, and most exciting dinosaur to ever be genetically engineered by scientists. 

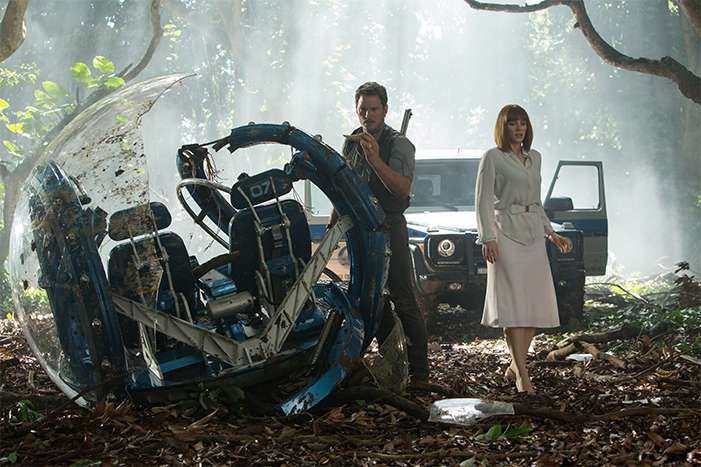
"Your Safety, is our top priority!"
No spoilers here folks but I freaking loved this movie! The trailers honestly ruin nothing about the movie which is exactly what you want out of a trailer. I was squeezing Josh's hand so hard during the tense moments and there a few scenes that make you jump. 

This film is the perfect amount of thrilling scenes mixed with action. I was literally on the edge of my seat for most of the movie.

If you liked the other Jurassic Park films, or even just want a new action/sci fi movie to watch. I completely recommend Jurassic World. It was everything I wanted it to be.

Were you planning to go see Jurassic World? Will you?


Follow
Follow Me on Bloglovin' / Follow Me on Instagram

How to Remove the Frame from Bloglovin'

15 June 2015

There has been much discussion and speculation about Bloglovin' stealing pageviews with the use of "frames". I've read through a lot of different blog posts about bloggers searching through the details and checking for ip addresses to see if they're actually getting pageviews when people view their posts through Bloglovin' either on the website or through the app.
The majority vote seems to point to no. When your blog is viewed through the frame you don't get any pageviews. You're even less likely to get pageviews when your blog is viewed through the app.
I have seen some codes that you can put into your blog template so that your blog with refresh out of the frame. Don't install this! I haven't found one that works properly, but I attempted to do this one time and it messes up your blog and refreshes the page every time you try and go back into template editor to remove it. 
What a blog looks like with the evil view stealing frame
If you use Bloglovin' to follow blogs and when you view them, they look like this. Then this guide is for you! Because we are going to turn it off! If you actually like the blogger that you are viewing, then you should want them to get the most pageviews that they can, views from your reading their blog. So let's turn it off.

Change Your Settings

It's super easy and here's how:

1. Click on your Profile picture up there on the right. The drop down list will open, and then click on "Settings"


2. Scroll right to the bottom of the Settings.  Under "The Bloglovin' Frame" Section you want to click the bubble "I don't want the frame" and then "Save Settings"
Easy Peasy!
Now sleep soundly knowing you are helping your fellow bloggers regain their hard earned views!
Share this post around to your readers to make sure they also remove the frame so you can start raking in the pageviews. 
Cya! xx

More from Blogging 101:


Follow Me on Bloglovin' / Follow Me on Instagram

OOTD & Shopping at Scout by Abicus

10 June 2015


When it's cold, usually I'm all for being indoors, rugged up in track pants, bed socks, slippers and a panda bear hoodie. But after multiple days of this impressive feat it can become incredibly boring, and you yearn for fashionable outfits once again. Not to mention that literally all of my snuggly warm indoor clothing is grey. Slippers, socks, track pants and jumper. I'm a walking raincloud. I made up that panda hoodie thing, but hey if you wanna send me one.

It's good to get out of the house every now and then, so I rugged up and walked to the street that is behind my house. The one filled with boutiques and restaurants, just waiting to take my hard earned cash.

Here's what I'm wearing right now:
Dark Grey Coat - Cotton On | All About Eve Singlet - Glue Store (similar) | Faded Blue Jeans - Topshop | Black Belt - Loop Leather Co |

I honestly can't believe I got this coat from Cotton On! And it's so quality too! Super glad I bought it.
I walked down to Scout by Abicus on Darby Street, one of my favourite boutiques, they have so many good brands, and the store and girls working there are soo lovely!

Have a look at this lovely Parisian Pear Candle - White Horse Home
I specifically went down there to try on these beauties, the St Kilda Boots by Soles. I really needed some low and short heeled boots to add to my collection for everyday wear. I tried these babies on and I was so impressed! They look rad and are definitely something that you can dress up or dress down.

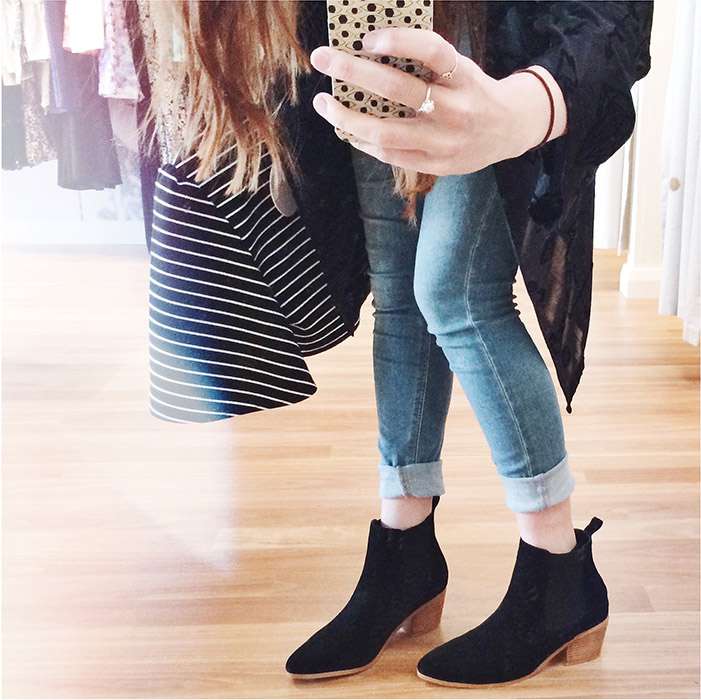
Taking sneaky boot selfies in Scout's massive mirror
Kaching! In the bag, along with that lovely pear smelling candle. I decided to layby two more things so I didn't feel like i'd thrown away all of my money in one day.

I picked up this amazing Nightingale Kimono by Evil Twin the Label, of which no photos do any justice but it is so amazing, that I had to get it. Little ole me, who doesn't own a single kimono. There will be photos when I get this. Also the La Femme Ruffle Top by Isla. This unique stripey top (which you can see me holding in the above pic) is so cute and actually part of a two piece, but I tried on the skirt and it's way too long for my short stature and just completely did not work on me. But would look lovely on others I'm sure!

Nightingale Kimono + La Femme Ruffle Top
Since both of these are probably more suited for warmer weather, I decided I wasn't in a complete hurry to have them in my wardrobe so the layby would suffice. There's also another pair of shoes on layby there from an earlier time that I need to get out, some open toe black leather mules.

Bye Bye money! See you next paycheck. I'm sure you can see why Scout by Abicus is one of my favourite clothing stores now. And how deadly it is that I live walking distance to it. My poor bank account.

Btw you can find Scout on Instagram here.

Cya! xx


Follow Me on Bloglovin' / Follow Me on Instagram

Quick HTML Trick for Comments

8 June 2015

Use this easy bit of code to link to your blog in comments!

So the thing to do whenever you comment on someone's blog is to leave your name, and your blog or you know, your latest blog post. You all mostly have this done and dusted.
But there's still a few that either don't have a clickable link, only the words www.blogger.com or you have a link and when you click it, I don't know if a lot of you realise but it doesn't work! It's because you're missing out on some of the web address that you actually need when you paste your code into the comments box.

I have my signature for comments open in a notepad on my computer, so I can always copy and paste it into comments when need be, which I'll just assume is what most people do, unless you're typing it out every time. (that is commitment!

Here is my signature for comments. 

Tegan xx - Permanent Procrastination

So I've got my name and I've got my blog there. So there are a lot of variations you can have of your own but here's the code you need for your very own comments signature.


That's the only code you need. So the "Your Blog Name"  is the section that will be getting linked.
So what is really important is that you include the "http://www" when writing your link, because even though you can type your blog as "blogname.com" into the url bar, if you have that as a link on someone else's blog and they click it, it will more often then not direct them to "www.theirblog.com/yourblog.com"  and then there will be an error being like THIS PAGE DOES NOT EXIST. Because obviously it doesn't.  And while that person can then just sigh and fix the url in the address bar so it actually does go to your blog, wouldn't you prefer it just went to your blog first go?? 
Side Note:
Some comment boxes do not accept HTML. Most do. Regular blogger does, Disqus does, as well as Wordpress. Google+ does not. Neither does this other one.. I can't remember what it is called but it's that one that when you go to comment a box pops up and gets you to log in one of your social media accounts... It could be Squarespace maybe.  Usually when it says "some html included" under the comment box, you want to see the <a> Then it means you can paste a link!
I look forward to seeing everyone's new comment signatures! Go ahead and give it a go and comment on this posts comment box! I'll let you know if there's anything you need to adjust so it works properly. 
Cya! xx

EDIT: I removed the apostrophes from either side of the URL in the coding now as a lot of people were having issues with them and it not working. So the new code should work with no dramas!

More from Blogging 101:


Follow
Follow Me on Bloglovin' / Follow Me on Instagram

My Winter Bucket List

5 June 2015 Australia

June 1st signaled the beginning of Winter here in Australia. Which I count as a pretty crappy season in down here as it still gets pretty darn cold but nowhere near cold enough to snow. So I have to deal with all the cold without any of the fun stuff. 

Not to mention how we are all conditioned to put Winter with Christmas, even though I don't live in the Northern hemisphere, everything Christmas themed here still has snow on it. Unless it's the complete opposite and Santa's sleigh is being pulled by Kangaroos. Nevermind!

We do have snow but it's quite a few hours drive away from me, and I won't be heading there this Winter. So what to put on an Aussie Winter Bucket list? 

Here's a few cold weather activities I hope to get up to in the new few icy months.

Our Bedroom - Before Shots

3 June 2015

If I'm going to update and restyle the bedroom then I definitely want some Before shots to compare them to, so here we are! I still love this duvet set and we will 100% be keeping it, I just plan to style the room more around the new duvet cover when it arrives. 

For money and organisation reasons, I'm going to focus on finishing one room at a time, and only do one room per month. So it will take a little longer to finish everything but it will be a lot smarter financially. I'm not made of money here!

The entire month also means I have plenty of time to find everything I need. 
So the room of the month for June is the Bedroom
My Side of the Bed (look how neat it is)
There's going to bed some serious bedside table styling going on! I'm talking art and books and well my cute little airplant can stay obviously. 
Josh's Side. (messy)
Josh's side of the bed is going to get styled as well. He will just have to love it! No exceptions. 
IKEA Kallax 2x4
We have a very large built in wardrobe, but we still needed some kind of system to store our undies, socks and pyjamas in. Instead of a chest of drawers we went with the IKEA Kallax cubes! I love our decision so much, it packs more of a statement than any old drawers would have, and the entire thing including baskets was cheaper than any of the drawers at IKEA. Awesome!

The top of our little Kallax is going to get styled, with some decor and an art piece.
Can't wait! It's looking pretty sad right now with the lone plant and oil burner. 
So there you go! I can't wait to show you the final results! It's going to look fab! Only wish we could paint the walls, because then they would be a lovely white and not that yellow beige colour. Ah well, you can only do so much in a rental.
Cya! xx


Follow Me on Bloglovin' / Follow Me on Instagram

How to Create a Favicon for Your Blog

1 June 2015


As you can probably tell from the picture, A Favicon is a small image that appears in tabs, and bookmarks in your internet browser. All good websites have them, and if you haven't edited yours before, you still have one but it will be the orange square with the white B in the middle. (If you're using blogger).

Gross! Your fancy blog is so much better than that! So here's a little guide showing you how you can create your own. I'll also show you how to install it! Spoiler alert, it's super easy! You'll wish you'd done it ages ago. 

Choose an Image

Because your favicon is incredibly small. About 16x16 pixels! You want to choose something that is going to be visible at such a tiny size. Which means sorry, that cute picture of your dog, it's not going to be very visible. But a clipart picture of a dog might be! It can be a bit of trial and error before you find out what is actually going to look good at such a small size.

Here are some examples:

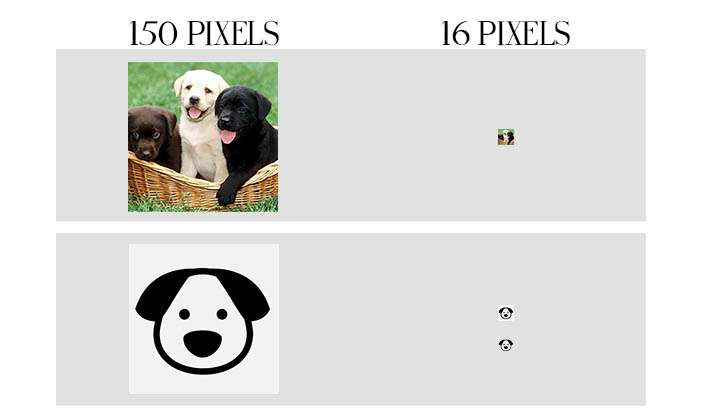
So the first one is a bust, to no one's surprise, but the second one! Puppies for all! As a bonus, see how much the dog icon stands out when there's no white around it, just some left inside the dogs face. That's because it's surrounded with transparent pixels. Don't freak out just yet! I'll explain everything..